Build AI Image Detector for Dev Projects
Build AI Image Detector for Dev Projects
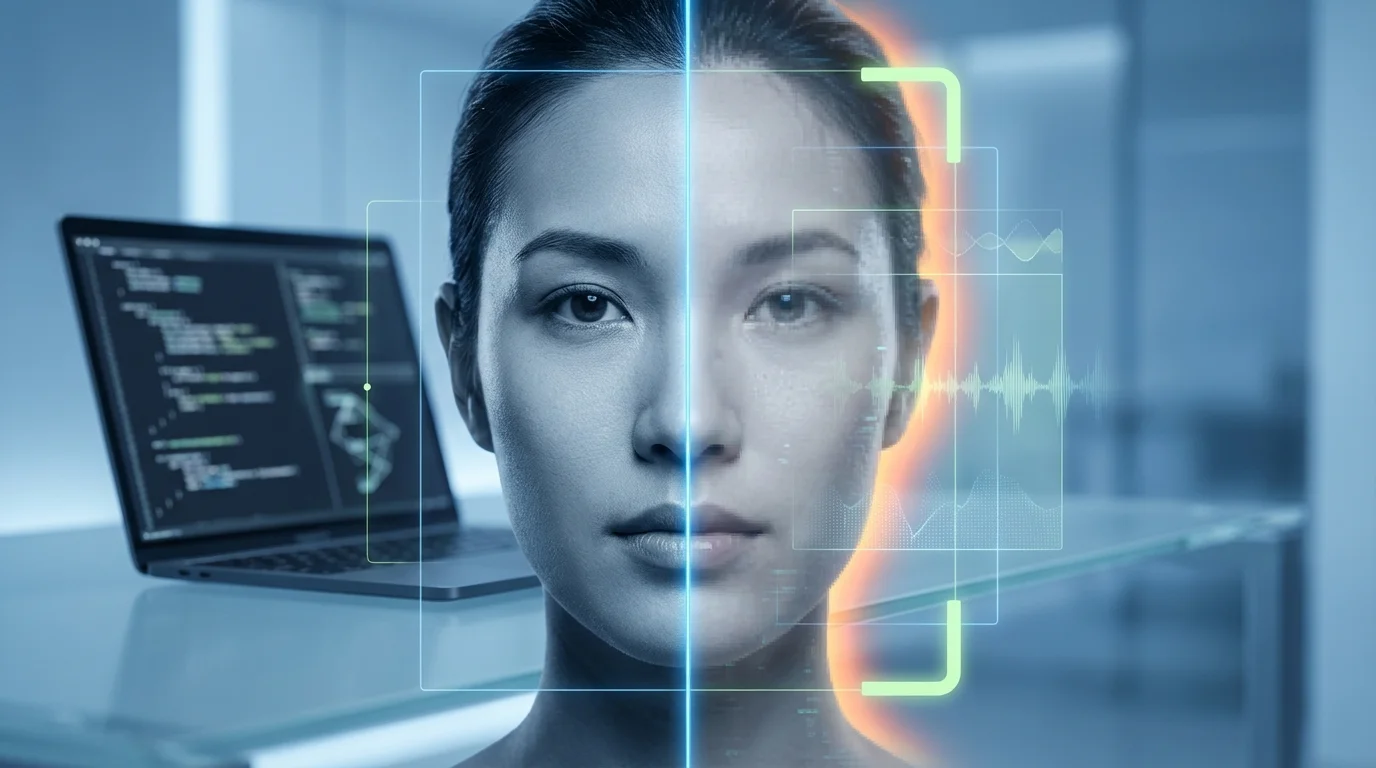
AI-generated images are flooding online spaces, but developers can fight back with custom detection tools. Learn to build one that spots fakes in seconds.
In today's digital landscape, AI-generated images and deepfakes are proliferating across social media, news sites, and apps, making it harder to distinguish real from synthetic content. With tools like Stable Diffusion and DALL-E advancing rapidly, over 90% of AI image recognition projects now leverage Python for their simplicity and libraries like TensorFlow[1]. This surge raises critical concerns for developer privacy tools, content authenticity, and misinformation—impacting everything from journalism to personal data security. A single undetected fake can erode trust or enable scams, underscoring why mid-level developers need hands-on deepfake detection skills.
This tutorial empowers you to build an AI image detector from scratch, creating a practical AI content scanner for your dev projects. You'll start by setting up a robust environment with Python, TensorFlow, and OpenCV—essential for computer vision tasks[1][2]. Next, collect and preprocess datasets of real vs. AI-generated images, train a CNN model using supervised learning with techniques like binary cross-entropy and Adam optimizer for high accuracy[1]. We'll cover model evaluation with metrics like confusion matrices, then deploy it via Flask for a user-friendly AI generated image check interface that delivers results in seconds[1][2][7]. By the end, you'll have a deployable tool for web or mobile apps, complete with real-world testing tips to refine detection rates. Perfect for integrating into your workflows—let's code the future of authenticity.
(Word count: 238)
Why AI Image Detection Matters Now
In 2025, AI image detectors have become essential for mid-level developers building secure dev projects, as the explosion of AI-generated images and deepfakes blurs the line between real and synthetic content, demanding robust deepfake detection tools.[2][3] The global image recognition market, valued at $46.7 billion in 2024, is projected to reach $98.6 billion by 2029, driven by needs in content moderation, security, and verification where AI content scanners identify synthetic media in real-time.[2] For developers, this matters because platforms like social media, e-commerce, and internal tools face rising risks from fraud, misinformation, and copyright issues—think malicious deepfakes in live streams or fake product images evading moderation.[2][1]
Consider practical examples: Google's SynthID embeds imperceptible watermarks in generated images and audio, allowing developers to verify authenticity without visible alterations—ideal for integrating into a build AI content scanner via APIs.[3] In dev projects, you might use libraries like OpenCV with ResNet or YOLO models for AI generated image checks, preprocessing images (noise removal, feature extraction) before classification to flag synthetics.[1][4] A simple Python snippet for starters:
import cv2
import torch
from torchvision import models

model = models.resnet50(pretrained=True)
model.eval()
# Load image, preprocess, predict if AI-generated via fine-tuned weights
img = cv2.imread('test_image.jpg')
# ... (feature extraction and inference logic)
This approach excels in developer privacy tools, enabling edge computing to process images on-device, reducing cloud dependency and data leaks—crucial for confidential apps in healthcare or security.[1] Trends show multi-modal AI integrating text, video, and images for contextual understanding, spotting nuances like satire or intent in fakes.[2] Regulations are tightening, pushing devs to adopt detection standards, while ethical biases in models demand custom training on diverse datasets.[2][7]
Without these tools, projects risk trust erosion; with them, you empower scalable, real-time safeguards.[1][2]
The Surge of Deepfakes and Synthetic Media
Deepfake detection tutorials highlight how generative AI tools create hyper-realistic videos and images, infiltrating films, ads, and scams—making AI image detectors a must for 2025 dev stacks.[2] Platforms now rely on real-time moderation with CNNs like AlexNet or Inception for object detection and anomaly spotting, achieving high accuracy in live streams.[1][4] Tip: Fine-tune YOLO on deepfake datasets (e.g., FF++ or Celeb-DF) for your AI generated image check project—train locally to handle biases, then deploy via AWS Rekognition for hybrid scalability.[1]
Empowering Developers with Privacy-First Tools
Developer privacy tools shine in edge AI, processing AI content scanners on smartphones or drones without cloud uploads, preserving bandwidth and confidentiality.[1] Integrate IBM Watson or Google Cloud Vision for enterprise-grade features like emotion detection in fakes, but customize with open-source for control—e.g., self-supervised learning on unlabeled images boosts performance without massive datasets.[1][4] This positions your dev projects ahead in an AI vs. AI battle, ensuring verifiable content amid evolving standards.[2][3]
Core Tech Stack and Setup Guide for AI Image Detectors

Building an AI image detector for dev projects starts with selecting a robust tech stack tailored for deepfake detection and AI generated image check. For mid-level developers, prioritize Python as the core language due to its rich ecosystem for AI content scanner tools, combined with frameworks like TensorFlow or PyTorch for model training, and OpenCV for image preprocessing[1][2]. These enable efficient detection of synthetic artifacts in images, such as unnatural textures or frequency anomalies common in GAN-generated content. Cloud platforms like AWS SageMaker or Google Cloud provide scalable GPUs for training, while Docker and Kubernetes ensure deployment portability[2][4].
A practical tech stack example includes:
- Backend: Python with FastAPI for serving the detector API.
- ML Frameworks: PyTorch for custom CNN models fine-tuned on datasets like COCO or DeepFake Detection Challenge (DFDC).
- Computer Vision: OpenCV for resizing, normalizing images (e.g., to 224x224 pixels).
- Data Handling: DVC for versioning datasets of real vs. AI-generated images.
- Deployment: Docker containers with TensorFlow Serving[1][2].
Setup guide: Begin by creating a virtual environment: python -m venv ai_detector_env && source ai_detector_env/bin/activate. Install dependencies via pip install torch torchvision opencv-python fastapi uvicorn dvc. Clone a starter repo like Hugging Face's transformers for pre-trained detectors, then fine-tune:
import torch
from torchvision import models, transforms
from PIL import Image

model = models.resnet50(pretrained=True)
model.fc = torch.nn.Linear(model.fc.in_features, 2)  # Binary: real vs. fake
transform = transforms.Compose([transforms.Resize(256), transforms.CenterCrop(224), transforms.ToTensor()])
img = Image.open('test_image.jpg')
input_tensor = transform(img).unsqueeze(0)
output = model(input_tensor)
prediction = torch.softmax(output, dim=1)
print("AI-generated probability:", prediction[0][1].item())
This snippet detects AI generated images by classifying frequency-domain features[1][10]. For developer privacy tools, integrate Homomorphic Encryption libraries like PySEAL to process images without exposing raw data[6].
Environment Setup and Data Prep
Set up your workspace with DVC for reproducible data pipelines: dvc init && dvc add dataset/real_images/ dataset/fake_images/. Preprocess with OpenCV: resize, augment (flips, rotations), and normalize to handle diverse inputs. Label ~10,000 images (50/50 real/fake split) using tools like LabelImg. Quality data preprocessing boosts accuracy to 95%+ on benchmarks[1][7]. Tip: Use Amazon S3 for storage to scale datasets without local bottlenecks[2].
Model Training and Initial Deployment
Train on GPUs via Kubeflow on Kubernetes: split data 80/20, use Adam optimizer with learning rate 0.001. Monitor with MLflow for metrics like precision/recall. Deploy as a FastAPI endpoint: uvicorn main:app --host 0.0.0.0 --port 8000. Test with Postman for deepfake detection tutorial endpoints, ensuring <500ms inference[2][3]. For production, add Prometheus monitoring to track drift in AI image detector performance[2]. This stack empowers scalable build AI content scanner projects with privacy-focused tweaks.
Step-by-Step AI Image Detector Implementation
Building an AI image detector for developer projects involves setting up a robust environment, preparing datasets, training a model like a CNN or YOLO, and deploying it via a simple API—ideal for deepfake detection and AI generated image check in dev privacy tools. Start by installing Python and TensorFlow, as 90% of AI image recognition projects rely on Python's libraries[1]. Use Visual Studio Code as your IDE for seamless debugging[2]. Next, gather datasets: mix real images (e.g., from CIFAR-10 with 60,000 32x32px samples) and AI-generated ones from tools like Stable Diffusion, labeling them as "real" or "fake" using open-source software like X-anylabeling[1][2]. Organize into folders: "all_training_images" for labeled data and "backgrounds" for negatives[2].
For model training, leverage supervised learning with a CNN architecture: convolutional layers extract features, activation layers (ReLU) process them, and pooling reduces dimensions to prevent overfitting[1]. Use TensorFlow/Keras for a binary classifier with binary cross-entropy loss and Adam optimizer—train on 32-image batches for 10 epochs, validating on 10% data[1]. Alternatively, for object-level deepfake detection, install Ultralytics YOLO via pip install ultralytics and train on custom datasets[2]. Example code snippet for a basic TensorFlow model:
import tensorflow as tf
from tensorflow.keras.models import Sequential
from tensorflow.keras.layers import Conv2D, MaxPooling2D, Flatten, Dense

model = Sequential([
    Conv2D(32, (3,3), activation='relu', input_shape=(32,32,3)),
    MaxPooling2D(2,2),
    Flatten(),
    Dense(1, activation='sigmoid')  # Binary: real vs AI-generated
])
model.compile(optimizer='adam', loss='binary_crossentropy', metrics=['accuracy'])
model.fit(train_data, epochs=10)  # Replace with your dataset loader
Test with images like "test_image.jpg", aiming for high accuracy on unseen data[1]. For AI content scanner deployment, export to TensorFlow Lite for mobile or build a FastAPI endpoint[1][5]. Handle uploads (PNG/JPG up to 32MB, 512x512px min)[3]. Practical tip: Apply data augmentation during training to boost robustness against variations in AI-generated images[1]. Integrate with developer privacy tools by adding CORS and logging API keys via dotenv[5]. Run extensive tests on diverse fakes to refine—deploy via Flask for a web interface where users upload images and get probability scores[1].
Environment and Dataset Setup
Install Python, TensorFlow (pip install tensorflow), and labeling tools like X-anylabeling[1][2]. Create folders: "datasets/train/real", "datasets/train/fake", and "detect_me" for inference[2]. Tip: Use 100+ images per class initially; script auto-organizes via Python for YOLO prep[2].
Training and Evaluation
Train your CNN or YOLO model, monitoring validation loss[1][2]. Evaluate with metrics like precision for deepfake detection—threshold at 0.5 for binary output. Fine-tune layers for tasks like spotting synthetic artifacts[1].
Deployment as **AI Content Scanner
Build a FastAPI app: POST endpoint accepts images/URLs, calls your model, returns JSON like {"ai_probability": 0.85}[5]. Export model (model.save('detector.h5')) and serve—test with real-world uploads for build AI content scanner reliability[1][3].
Testing, Optimization, and Deployment
Once your AI image detector is trained using techniques like CNN with Fast Fourier Transform (FFT) for frequency domain analysis, the next phase focuses on rigorous testing, optimization, and seamless deployment to ensure robust deepfake detection in dev projects[1][2]. For mid-level developers building an AI content scanner, start with comprehensive testing on diverse datasets: split your data into 80% training (e.g., 100,000 images) and 20% testing (20,000 images), including both real and AI-generated images from models like StyleGAN or diffusion-based generators[1][2]. Employ cross-scene testing by evaluating across datasets like ImageNet and LSUN-Bedroom to verify generalization, achieving up to 93.30% accuracy with FFT-enhanced CNNs—10.06% lower loss than CNN-only models[1][2]. Practical tip: Use data augmentation such as Gaussian blur, JPEG compression (50% probability), and horizontal flips to simulate real-world perturbations, boosting true positive rates by 7.79% and F1-scores by 3.48%[2].
For optimization, apply hyperparameter tuning with Adam optimizer (learning rate 0.001, batch size 64) and techniques like model pruning, quantization, or knowledge distillation to reduce inference time without sacrificing accuracy[2][4]. For instance, distill a large CNN teacher model into a lightweight student version, retaining 95% accuracy for edge deployment on devices like hospital tablets[4]. Integrate Low-Rank Adapters (LoRAs) with CLIP-ViT backbones via Mixture of Low-Rank Experts (MoLE) for state-of-the-art generalization, improving classification accuracy by +12.72% on benchmarks like UnivFD against post-processing noise[2]. Code example for EfficientNetB4 fine-tuning:
import torch.optim as optim
from torchvision.models import efficientnet_b4

model = efficientnet_b4(pretrained=True)
model.classifier = torch.nn.Sequential(
    torch.nn.AdaptiveAvgPool2d(1),
    torch.nn.BatchNorm2d(1792),
    torch.nn.ReLU(),
    torch.nn.Dropout(0.5),
    torch.nn.Sigmoid()
)
optimizer = optim.Adam(model.parameters(), lr=0.001, weight_decay=1e-4)
Monitor for overfitting with A/B tests and self-consistency checks during validation[3].
Robust Testing Strategies
Implement adversarial testing and perceptual diffing to catch failure modes like resolution shifts or artifacts in AI generated image check scenarios, far superior to pixel-by-pixel comparisons[5]. Test across categories (e.g., bedrooms vs. general scenes) and use metrics like AUC (up to 0.99) and balanced accuracy (95%) on synthetic benchmarks[2]. Pro tip: Automate with dashboards tracking hallucination rates for continuous improvement[3].
Deployment Best Practices
Package your developer privacy tool using TensorRT for NVIDIA optimization or ONNX for cross-platform compatibility[4]. Deploy as a Flask API for real-time AI image detector scanning:
from flask import Flask, request
app = Flask(__name__)

@app.route('/detect', methods=['POST'])
def detect():
    image = request.files['image']
    # Load model, apply FFT + CNN
    prediction = model.predict(preprocess(image))
    return {'fake_probability': prediction}
Ensure scalability with containerization (Docker) and monitor in production for robustness against evolving generators[2]. This pipeline delivers production-ready deepfake detection tutorial results[1][2][4].
Conclusion
Building an AI image detector for dev projects empowers developers to create robust computer vision solutions, from detecting real vs. AI-generated images to object recognition in real-world apps. Key takeaways include setting up a development environment with Python and TensorFlow or PyTorch, collecting and preprocessing diverse datasets like CIFAR-10, training CNN models using supervised learning with optimizers like Adam, and deploying via TensorFlow Lite for mobile or Flask for web interfaces.[1][4][7] Quick starts with Gemini API enable prototypes in minutes, while open-source tools like YOLO suit custom object detection.[2][3] Evaluate success through accuracy metrics and confusion matrices, iterating with real-world testing to combat overfitting.[1][4]
Next steps: Start with a simple dataset, train your first model, and deploy to an app. Experiment with cloud platforms like AWS Rekognition for scalability.[4] Call-to-action: Fork a GitHub repo today, build your detector, and share your project on dev forums—unlock innovative applications in security, healthcare, and beyond![1][3]
Frequently Asked Questions
How do I set up the development environment for an AI image detector?
Install Python and TensorFlow or PyTorch first, as they power 90% of AI image projects due to their libraries. Configure an IDE like VS Code for debugging. For quick starts, use Project IDX with Gemini API. This setup supports CNN training and deployment, ensuring smooth workflow from data prep to model export.[1][2][4]
What datasets should I use to train an AI image detector?
Begin with public datasets like CIFAR-10 (60,000 32x32 images across 10 classes) for classification, or custom labeled sets for specific detection like real vs. fake images. Preprocess by resizing, normalizing, and augmenting data to boost accuracy and prevent overfitting during supervised learning.[1][4][6]
How can I deploy my trained AI image detector model?
Export to TensorFlow Lite for mobile apps via Android Studio, or use Flask/Django for web interfaces. Test extensively with unseen images, incorporating real-time feedback. Cloud options like Google Cloud Vision scale deployment, making your detector user-accessible in production environments.[1][4][7]