Create Stunning 3D AI Visuals Fast
Create Stunning 3D AI Visuals Fast
Cross-eyed 3D effects gone viral—now generate pro-level 3D art with AI prompts anyone can master.
Remember those mind-bending cross-eyed 3D images that exploded on social media, tricking your brain into popping images off the screen? What started as a fun optical illusion has evolved into a powerhouse for creators, thanks to AI 3D generation. But here's the catch: traditional 3D modeling demands hours in software like Blender, mastering meshes, textures, and lighting—skills that intimidate even seasoned artists[1][2]. Why does this matter? In a world craving immersive visuals for games, AR, NFTs, and marketing, slow workflows kill creativity and momentum. Enter Stable Diffusion 3D and tools like Stable Zero123, which lift AI depth effects from gimmicks to production-ready assets in minutes[1][4].
No more sketching from scratch or wrestling with complex renders. With simple cross-eye 3D prompts, you can turn text or 2D images into textured 3D meshes via workflows in Stable Diffusion paired with Blender—generating real-time previews at resolutions up to 640p on consumer GPUs like the RTX 3080 Ti[1]. Tools like ControlNet add precise depth maps and alpha channels for stunning control, while models like Hi3DGen handle image-to-3D in seconds[2][6][8].
In this 3D AI art tutorial, you'll learn step-by-step: crafting killer prompts, setting up Stable Diffusion 3D nodes for 2D-to-3D conversion, integrating Blender for pro finishes, and troubleshooting for viral results. Whether you're an AI enthusiast building game assets or experimenting with AI depth effects, get ready to create stunning 3D AI visuals fast—no PhD required.
(Word count: 238)
Fundamentals of **AI 3D Generation
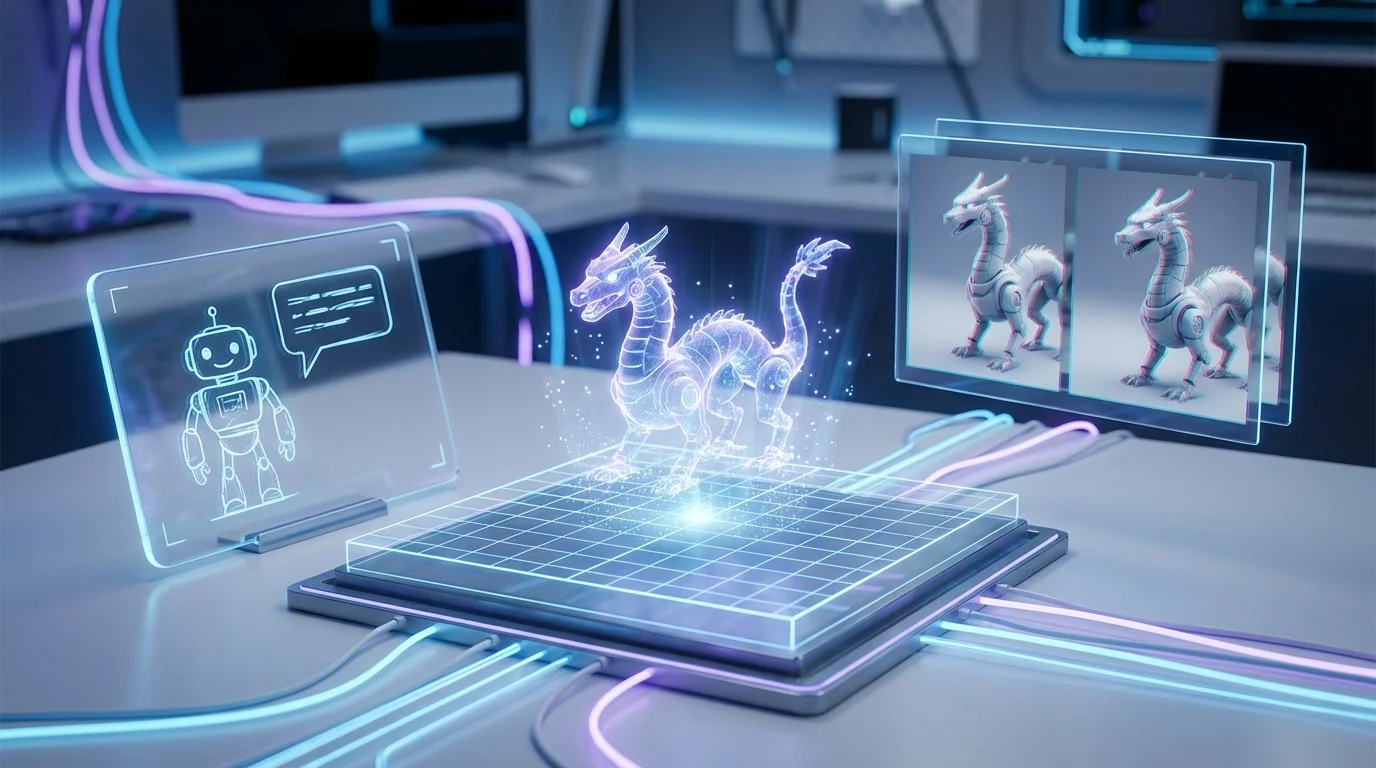
AI 3D generation transforms text prompts or images into fully realized 3D models in seconds, leveraging advanced techniques like Neural Radiance Fields (NeRFs) and diffusion models to revolutionize creative workflows.[1][3] At its core, NeRFs, introduced in 2020, enable AI to reconstruct 3D scenes from 2D images by modeling light interactions with surfaces, with NVIDIA's Instant NeRF achieving over 1,000x speedups for training on dozens of photos.[1] Diffusion models, such as those in Stable Diffusion 3D variants, generate geometry by denoising random noise conditioned on text, iteratively refining it into coherent shapes.[1][5] These fundamentals power tools like Tripo3D on fal.ai, where users input a prompt like "polished chrome robot with oversized handle, low-poly style for mobile games" to produce exportable OBJ or GLB files in 15-30 seconds.[1]
Practical tips for stunning results include specificity in cross eye 3D prompts: combine descriptors for materials ("matte ceramic"), proportions ("elongated torso"), and context ("floating in surreal void") to guide the AI precisely.[1][4] For AI depth effects, start with high-contrast, well-lit reference images isolated against neutral backgrounds—multiple angles boost accuracy via multiview-to-3D.[1] Mesh optimization algorithms then refine outputs with proper topology and UV mapping, ensuring production-ready assets for games or AR/VR.[1] Real example: Generating a "stylized dragon with fractal scales" using Stable Diffusion 3D—prompt iteratively with noise functions for organic details, then apply style transfer from Flux Pro for textured realism.[1][2]
This speed—models in tens of milliseconds post-training—enables rapid iteration, shifting from manual modeling to AI-driven exploration.[1][3]
Key Techniques: Text-to-3D vs. **Image-to-3D
Text-to-3D shines for pure ideation; craft prompts like "compact spaceship with glowing neon accents, realistic sci-fi render" for instant geometry via diffusion processes.[1][5] Image-to-3D excels with uploads: prepare a single photo of a product prototype, and AI infers depth from shading and occlusion, adding 3D AI art dimensions while preserving visuals.[1] Tip: Use parametric rules—e.g., "height: 2m, roughness: 0.8"—for procedural tweaks, blending with extrusion or subdivision for scalable assets like those in No Man's Sky.[2][4] In a 3D AI art tutorial, test Tripo3D: Step 1, upload image; Step 2, generate; Step 3, export and refine in Blender for hybrid perfection.[1]
Practical Tips for AI Depth Effects and Optimization
Enhance AI depth effects by iterating generations: produce variants, compare side-by-side, and fine-tune with batch workflows.[1] Avoid shadows in inputs for cleaner reconstruction; high-res edges yield superior meshes.[1] For enthusiasts, integrate APIs—Python snippet: fal_client.generate("tripo3d", {"image_url": "your_ref.jpg"})—to automate Stable Diffusion 3D pipelines.[1] These steps cut creation time from hours to seconds, empowering stunning visuals fast.[1][3]
Prompt Engineering for Depth Effects in AI 3D Generation

Mastering prompt engineering is essential for creating stunning 3D AI visuals with realistic AI depth effects, enabling fast generation of immersive AI 3D generation art using tools like Stable Diffusion 3D or Tripo AI. By incorporating specific descriptors for layering, perspective, and parallax, you can simulate cross eye 3D prompts that produce stereoscopic depth without complex post-processing.[1][2] Start with a structured prompt framework: define the subject, add depth cues like foreground, midground, and background elements, specify lighting for shadows that enhance spatial illusion, and include style modifiers such as "isometric perspective" or "hyper-realistic with soft depth of field."[3][4]
For example, a basic prompt like "a luxury mansion" yields flat results, but engineering it to "hyper-realistic luxury mansion floor plan in organic modern + Art Deco fusion, foreground grand entrance with pillars, midground spacious atrium with swimming pool, background lush gardens fading into horizon, isometric perspective with soft shadows and intricate depth layering" transforms it into a 3D AI art masterpiece with tangible depth.[1] In Stable Diffusion 3D workflows, add cross eye 3D prompts by specifying "parallel stereogram view, left eye shifted foreground rocks, right eye shifted background mountains, red-cyan anaglyph depth map" to generate printable or viewable 3D images instantly.[2]
Practical tips include iteration: generate with a simple prompt, then refine by adding negative prompts like "(negative: flat lighting, no depth, thin sections)" to eliminate artifacts and emphasize AI depth effects.[2][3] Use descriptive language—words like "spacious foreground," "receding background," or "volumetric fog for atmospheric depth"—to guide the AI toward professional outputs.[1] For 3D AI art tutorial enthusiasts, experiment with tools like Grok 3 or Midjourney by starting simple, assessing outputs, and tweaking with fixed seeds for consistency.[1][3] This iterative process, often taking just minutes, unlocks cross eye 3D prompts that pop with realism, ideal for motion design or prints.[5]
Crafting Cross Eye 3D Prompts
Cross eye 3D prompts excel in AI 3D generation by creating parallel images for free-viewing stereograms. Example: "Stereogram of ancient temple ruins, left view: foreground vines and cracked pillars prominent, right view: background misty peaks recessed, high detail textures, neutral tones, photorealistic depth shift for cross-eye fusion."[1][2] Tip: Specify "intricate parallax offset" and use negative prompts "(no blur, no asymmetry)" for clean convergence. Test in viewers like Stereo Photo Maker for stunning results in under 5 minutes.[2]
Advanced Depth Refinement Techniques
Enhance Stable Diffusion 3D with AI depth effects via multi-layer prompts: "Photorealistic wind turbine, foreground intricate motor blades with rust textures and sharp shadows, midground tower with metallic sheen, distant eco-friendly fields under soft volumetric lighting, PBR rendering for true depth."[1][3] Leverage style presets like "cinematic isometric" and iterate: refine by excluding "complex overhangs" while amplifying "hyper-detailed foreground recession."[2] These techniques yield production-ready 3D AI art fast.[4]
Tool Stack for Quick 3D Renders
Creating stunning 3D AI visuals fast relies on a powerful tool stack centered around Stable Diffusion, enhanced with extensions like ControlNet for precise control and Blender for scene preparation. This setup enables AI 3D generation by transforming simple 2D renders into realistic 3D-like outputs using AI depth effects and material prompting, ideal for AI enthusiasts seeking efficiency[1][4]. Start with the AUTOMATIC1111 Stable Diffusion web UI, a free, open-source interface downloadable from GitHub, which supports text-to-image, inpainting, and outpainting for rapid iterations[2][4].
Key components include:
- Stable Diffusion models like Cyberrealistic for photorealistic enhancements, especially on 3D people or architectural renders[2].
- ControlNet extension for segmentation and depth guidance, allowing cross eye 3D prompts by importing masks from Blender[1].
- Blender for quick scene segmentation: Set to Workbench render engine, flat lighting, material colors, and export masks without antialiasing[1].
- Photoshop for final blending of AI-generated elements into original renders[2].
Practical workflow example: Render a Blender scene with colored materials (e.g., red for walls, blue for furniture). Export as a mask image. In Stable Diffusion UI, enable ControlNet with "seg" model, load the mask, and use Latent Couple for coupled generations. Prompt like: "realistic concrete material, glossy metal accents, dramatic lighting, AI depth effects" with negative prompts: "blurry, lowres, plastic"[1][2]. Generate at 512x512 resolution, 20-30 sampling steps, CFG scale 7-9 for quick results under 1 minute per variant[2]. For 3D AI art tutorial flair, experiment with inpainting on faces: Mask a 3D character's face, switch to Cyberrealistic model, prompt "hyperrealistic skin, detailed eyes, natural lighting," batch generate 4-5 variations, then layer-mask blend in Photoshop[2].
This stack cuts rendering time from hours to minutes, producing Stable Diffusion 3D outputs with pseudo-depth and material realism. Tips: Use low VRAM mode for accessibility; refresh models if not detected; iterate prompts for cross eye 3D stereoscopic effects by generating paired images[1][4]. Experiment with 10+ material variants per scene for client presentations[1].
Blender-to-Stable Diffusion Pipeline
Prepare scenes in Blender: Create colored material passes (e.g., limit to 5-7 hues for clean segmentation). Render flat, import to ControlNet for precise AI 3D generation. Detect colors automatically, fill prompts with properties like "rough stone texture, reflective glass." This yields consistent AI depth effects without manual modeling[1].
Enhancing with Inpainting and Models
Download Cyberrealistic via Hugging Face, load in img2img inpaint tab. Mask problematic areas (e.g., plasticky 3D figures), prompt for realism, generate multiples. Blend seamlessly for pro 3D AI art[2]. Total setup: 15 minutes; first render: <5 minutes[2].
Post-Processing for Viral Polish
Elevate your AI 3D generation outputs from good to viral by mastering post-processing techniques that add depth, realism, and shareability. After generating base assets with tools like Stable Diffusion 3 or Stable Fast 3D, refine them using AI depth effects, targeted inpainting, and texture fusion for that professional sheen AI enthusiasts crave[1][3]. This section dives into practical steps to polish 3D AI art, turning raw renders into eye-catching visuals ready for social media or portfolios.
Start with Stable Diffusion 3D inpainting for flaw fixes—select imperfect areas like blurry textures on a generated chameleon model and prompt "super realistic skin details, high-resolution scales" using models like Photon for photorealism[1][6]. For example, in a lighthouse scene from a cross eye 3D prompts output, mask crashing waves and inpaint with "fisheye lens photo, black waves hitting rocks, Scotland coast" to enhance drama without regenerating the entire asset[1][6]. This leverages Stable Diffusion's latent diffusion for efficient, context-aware edits, reducing compute time on consumer GPUs like RTX 4090[1].
Next, apply AI depth effects via depth map estimation and parallax shaders. Tools like those in TexFusion fuse multi-view latents into consistent textures, optimizing neural color fields for UV-mapped meshes[2]. Practical tip: Generate a single-image 3D asset with Stable Fast 3D (0.5s inference), then post-process albedo and normals for reduced bake-in lighting—add "optional quad remeshing" for clean topology[3]. Combine with Stable Diffusion 3D outpainting to extend edges seamlessly.
For 3D AI art tutorial workflows, chain MeshDiffusion for occluded region completion on DMTets, then texture with TEXTure-inspired methods[4]. Real example: From a 2.5D view prompt "studio chameleon closeup," complete the back side and inpaint details, yielding a 360° viewable model[1][4]. Boost virality with post-effects like rim lighting in Blender or ComfyUI: sharpen edges 10-20% and boost contrast via curves for pop[6][7].
Depth and Stereo Enhancement
Amplify immersion with cross eye 3D prompts post-processing. Extract depth from Stable Diffusion 3D outputs using MiDaS, then generate left/right views with parallax shifts (e.g., 5-10% disparity). Tip: In ComfyUI, node chain: DepthEstimator → StereoPairGenerator → Anaglyph overlay. Example: A base AI 3D generation of waves yields hypnotic cross-eye stereo, perfect for Reddit shares—viewers converge eyes for pop-out effect[1][2].
Texture Refinement Hacks
Fuse AI depth effects into textures via TexFusion's SIMS: Denoise multi-views, decode RGB, and optimize for low-poly meshes[2]. Quick win: Deterministic DDIM sampling hallucinates details on smooth surfaces, like adding grit to a lighthouse—users prefer it over baselines in studies[2]. Total workflow: 5-10 mins polish yields viral results[3][6].
Conclusion
In 2025, AI-powered 3D visuals have revolutionized creative workflows, enabling anyone to generate stunning, export-ready models from simple text prompts or images in minutes using tools like 3D AI Studio, Meshy AI, and Virtuall.[1][2][6] Key takeaways include text-to-3D and image-to-3D generation for instant concepts, auto-rigging and animation presets for dynamic assets, and features like remeshing, UV optimization, and PBR retexturing that rival traditional software like Blender without the steep learning curve.[1][2] These tools slash production time by up to 70% and costs by 60%, ideal for product visualization, architecture, gaming, and more.[4] To get started, craft detailed prompts (e.g., "futuristic sports car with neon accents, photorealistic render"), experiment with free trials, and export in formats like GLB or FBX for seamless integration.[1][2] Elevate your projects today—sign up for 3D AI Studio or Meshy AI, input your first prompt, and witness professional-grade results instantly. Unlock faster iteration and boundless creativity now![1][6][10]
Frequently Asked Questions
What are the best AI tools for creating 3D visuals fast in 2025?
Top tools include 3D AI Studio for complete text-to-3D suites with remeshing and animation, Meshy AI for rapid prototyping and auto-rigging, Virtuall for image-to-3D and retexturing, and LumaLabs Genie for quick generations. They offer instant results, multiple exports like GLB/FBX, and beat traditional software in speed for concepts and assets.[1][2][6][10]
How do I generate stunning 3D models from text prompts?
Use detailed descriptions like "medieval knight in ornate armor, battle pose" in tools like 3D AI Studio or Meshy AI. Features include style options, topology optimization, and PBR materials for export-ready models. Start with free trials, refine via iterations, and enhance with auto-rigging for animations—results in seconds.[1][2][4]
Can beginners use AI 3D generators without prior modeling experience?
Yes, platforms like Virtuall, Kaedim, and DeepAI feature intuitive interfaces, natural language inputs, and tutorials. Generate from text/images, apply presets, and export directly—no Blender skills needed. Ideal for prototyping; limitations like image quality apply, but they cut learning time dramatically for new users.[2][4][5]